
Before you leave...
Take 00% off your first order
00% off
Enter the code below at checkout to get 00% off your first order
A pondless water feature has no open body of water at the end of the falls. Instead, the water is held within water retention cubes, which are durable, allowing a decorative stone, like river rock, to be placed on top; this gives off an overall effect of water “disappearing” into a bed of stone.
Benefits of a Pondless Waterfall:

Pump vaults are extremely durable and allow for easy access to the pump and allows you to view the water level if needed. Pumps vaults give the pump open space around its intake to prevent clogging.
| Components Of A Pondless Feature | |
|---|---|
|
Diffuser/Spillway A diffuser or spillway starts the waterfall or stream. It allows water to flow evenly and can handle high volumes of water. It can also withstand heavy rocks or aggregate being placed directly on top. Must be installed during construction process! |

|
|
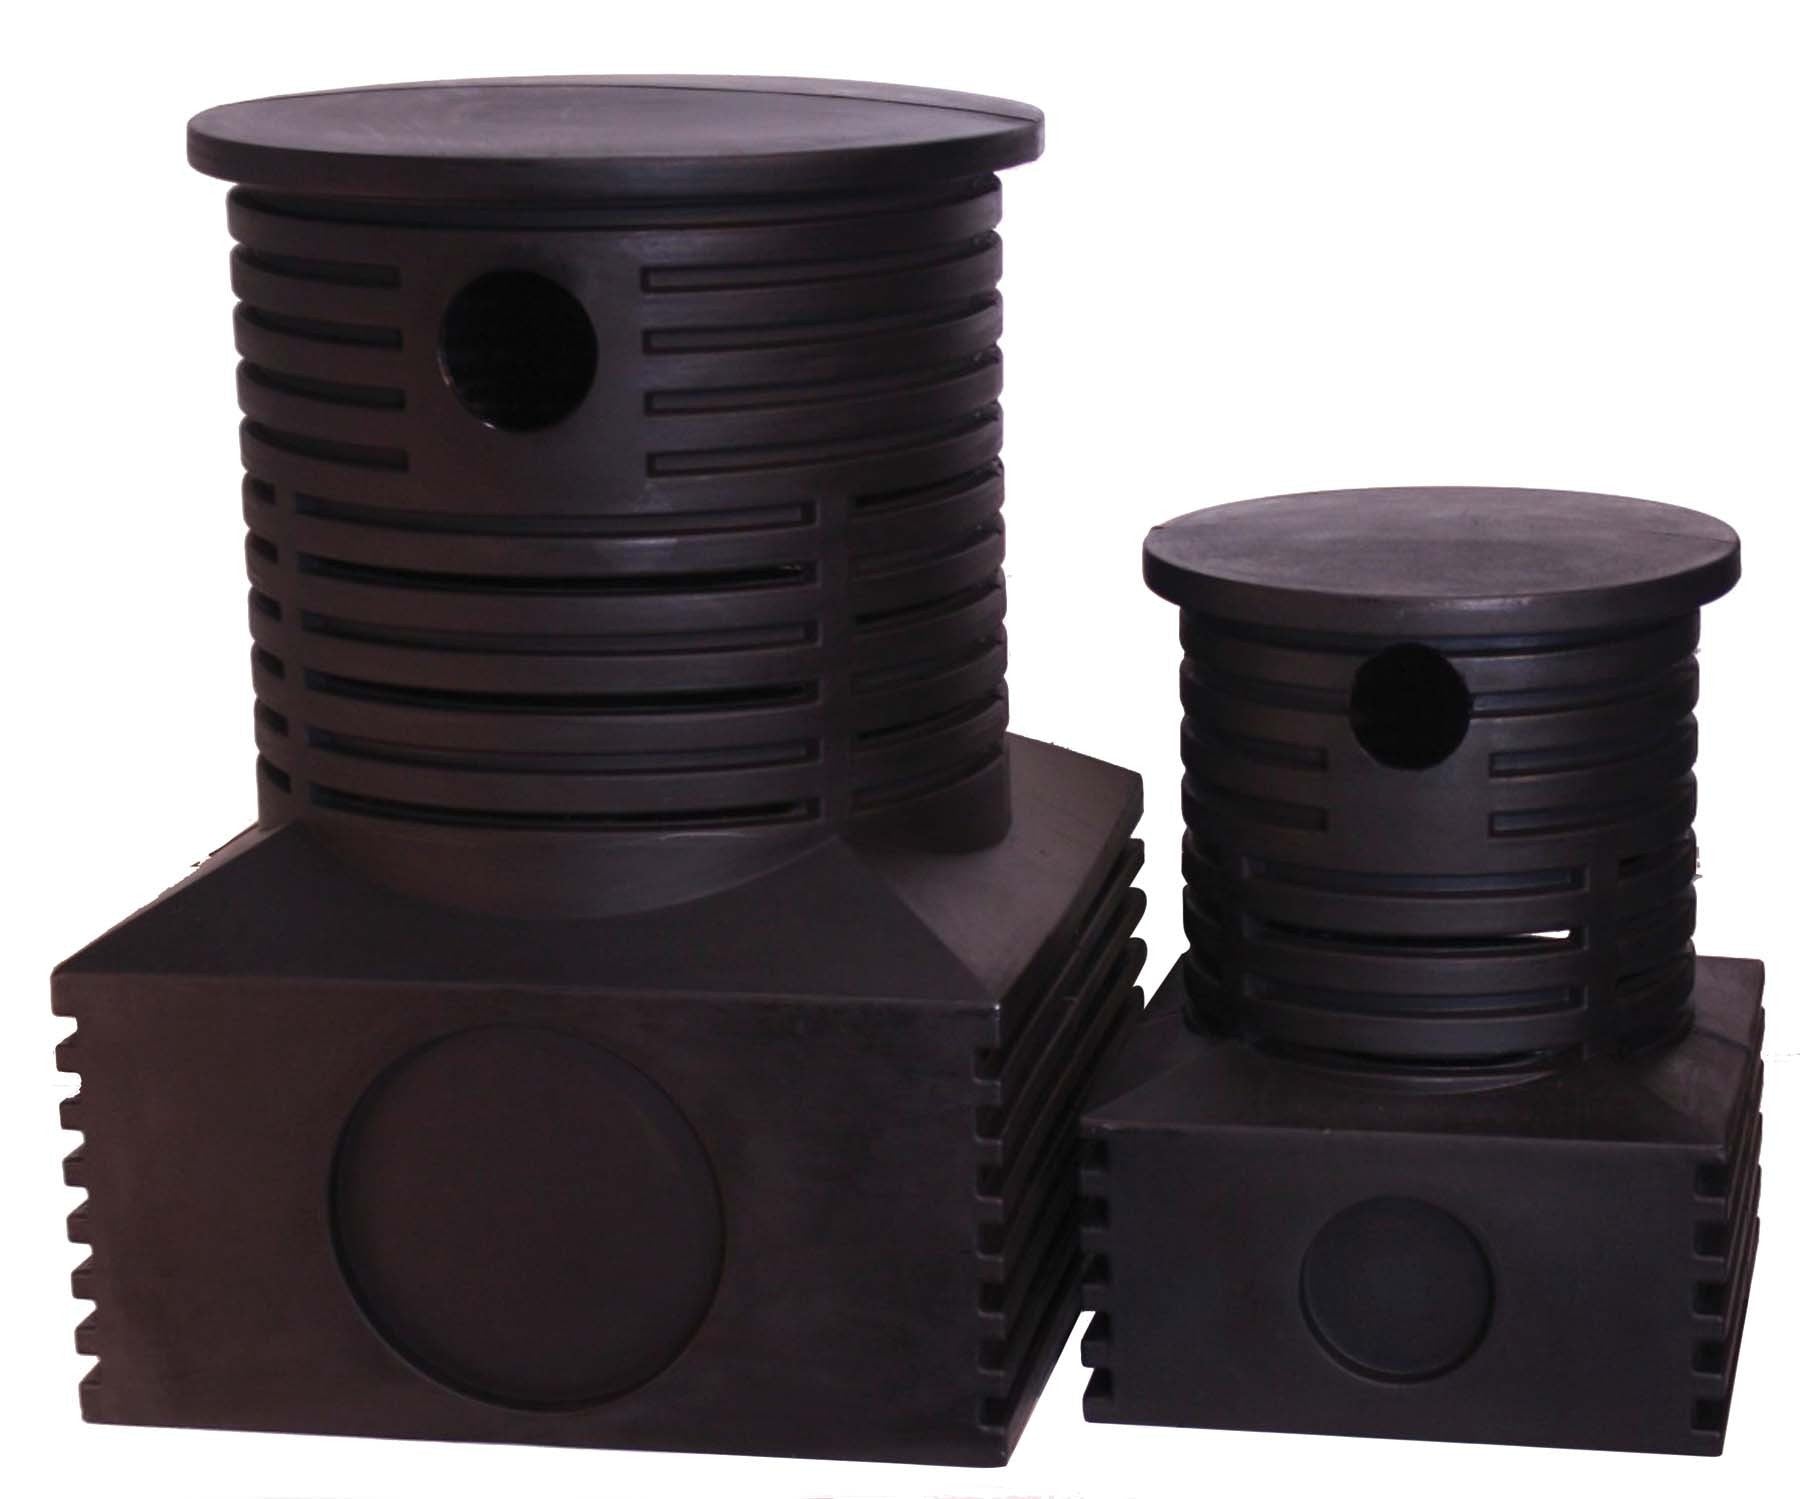
Water Retention Cubes Water retention cubes are used in the water reservoir to retain more water than gravel or any other aggregate. They can bear heavy weight, do not clog like an aggregate could, allow for a smaller reservoir due to their water retention capacity and are lightweight and easy to install. Must be installed during construction process! |

|
|
Pump Vault Pump vaults are extremely durable and allow for easy access to the pump and allows you to view the water level if needed. Pumps vaults give the pump open space around its intake to prevent clogging. Must be installed during construction process! |
|
|
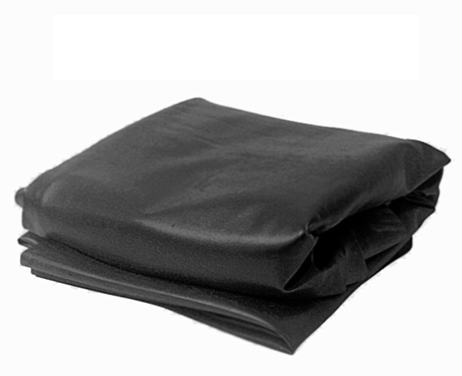
EPDM Liner & Underlay EPDM Liner (45 mil) is used to line the pond and behind the falls/stream. This liner is flexible and durable. Thick filter cloth material is used under liner for protection. Can also be used on top of liner under larger rockery. Must be installed during construction process! |
|
|
Submersible Pump A submersible pump is placed within the pump vault beneath water. This pump circulates the water back up to the spillway. Must be installed during construction process! |

|
|
PVC Flex Pipe And Fittings, Glue And Primer PVC Flex pipe is used to connect the pump to the spillway. PVC flex pipe is durable and flexible. PVC fittings are used in pond construction for durability to withstand sunlight and freezing. PVC glue and primer fuse the fittings to the pipe. Must be installed during construction process! |

|
|
Waterfall Foam Waterfall foam is expanding foam that is used between the rockery within the stream to prevent the running water from falling between the rocks. It allows the stream water to be more visible.Must be installed with dry stone! |

|
|
Float Valve or electronic Water level Controller A float valve or electronic water level controller maintains a constant water level in your pond. It easily connects to a ½” water supply line. These units ensure your pond water never drops too low. Can be installed in the pump vault. Optional! |

|
|
Check Valve or Ball Valve A check valve or a ball valve is used within the pump vault, in-line to prevent the water that is stored in the flex pipe from draining back into the reservoir once the feature is turned off. This prevents overflow of the reservoir when the feature is turned off. Optional! |

|
|
Ionizer An ionizer releases ions into the water through a probe which is placed in the pipe line, in the skimmer or in a stream. An ionizer is the only mechanism that can control/eliminate string algae that can build up on your rocks and stream. Optional! |

|
|
Rockery Any form of rockery can be used for a pondless feature. Usually a mix of large and small rockery with river rock provides a natural setting and is easy to work with while constructing the stream or falls. Must be installed during construction process! |

|
| 8 Steps To Install A Pondless Water Feature | |
|
Step 1: Plan Ahead Begin by determining how large of a feature you are looking to create. Use the following formula to determine your reservoir size and the amount of flow you will require. Many people will undersize their reservoir, unaware of how much water is required for their entire stream. Reserviour Size
Calculating Waterfall Flow Rate
Width Of Spillway X Desiered Flow Rate = Total Gph EXAMPLE: Waterfall with a 24" wide spillway:
|
 |
|
Step 2 Begin by determining how large of a feature you are looking to create. Use the following formula to determine your reservoir size and the amount of flow you will require. The soil being removed can be used to build up where the stream will be located. |
 |
|
Step 3 Line the stream and reservoir with one piece of underlay then EPDM liner. Ensure your liner overlaps the edges to prevent shifting and leaks over time and that the edges are higher than the water line |
 |
|
Step 4 Place your up -flow filter/ spillway/diffuser at the top of your stream. Your liner should go behind the diffuser or attach to the front plate of the up flow filter/ spillway. Ensure the waterfall starter is level and sturdy. |
 |
|
Step 5 Place your water retention cubes in the reservoir along with the pump vault. A snug fit is best for a sturdy reservoir. The pump can be placed within the vault. Connect the spillway to the pump using PVC Flex pipe. Near the pump, install a check valve to prevent the water in the pipe from draining back into the reservoir when the pump is turned off. A valve is also handy to control the water volume. |
 |
|
Step 6 Get creative! Using the rockery of your choice, begin around the spillway and stream, ensuring the liner does not get folded down, which may cause a leak. Begin with your largest stones and fill in with the smaller stones. Pond foam can be used in the stream to fill in between larger rocks and prevent the water from disappearing under the stones. |
 |
|
Step 7 Cover the water retention cubes and pump vault with decorative stone. The pump vault lid should remain accessible by lightly covering it with decorative stones. |
 |
|
Step 8 Fill reservoir with water and turn on the pump. Ensure no water is being diverted from the stream by any of the rockery. Add Finishing Touches. Add plants and lighting to highlight your feature! |
 |
Thanks for subscribing!
This email has been registered!
Take 00% off your first order
Enter the code below at checkout to get 00% off your first order
